Related pages
- 3D printed I1 coaches
- M1 coaches
- weathering
- NS Hbis wagons
- NMBS Hbikks wagon
- NMBS Fal wagon
- new wagons with used looks
- plasticard lowloader
- G10 van
- plasticard wagon
- replacing frames
- rebuilding frames
- upgrading tank wagons
- casting new wagons
- plasticard coaches
- trial hopper wagons
photo section

An old Type of Van

A drawing of this wagon done in 3D for the purpose of using in a 3D printing process. The result was unfortunately not satisfying due various reasons such as resolution of the printer, type of plastic and wall thickness of the model.

A preserved but not yet restored example of such a wagon in St. Ghislain, TSP
 Various early attempts using the above 3D drawing. Unfortunately on close inspection of the assembled model this turned out to contain an error due to misinterpretation on my side of a printed dimension in the drawing, the sides being too low making the curve in the roof too large. Also note the difference in planking depth between the top and bottom attempt, it concerns only about 0.05 mm but even such a small difference already leads to the much too coarse planking representation as seen on many commercial rtr wagons.
 A completed 5 sided box made using the milling machine, although not perfect it is a lot better than the 3D printed effort.
This wagon resembles the german G10 closed goods wagon in nearly all aspects. The origin of these wagons is most likely identical as the Belgian state inherited several 1000's of this type of wagon after WW1 as war damage repair. Many photo's exist which show these wagons with numerous small differences in strapping details, particularly differing at the height of the solebars. The freight bill box and chalking area can be found on the left most panel as well. Also the lettering can be found in any of the 3 left hand panels. This contrary to the loading and ventilation opening which are always located in the outer panels. On German wagons these were normally in the second panel.
This body will now be prepared for casting a series of copies using silicon mould and PU resin.
 From 2mm waste material a 5 sided box is prepared for producing the rubber mould.
 The model is stuck with double sided tape into the box. The model is prepared with an extra ridge at the bottom to prevent trapped air bubbles on top spoiling the casting.
 To prevent air bubbles attaching to the surface of the model a relative thin layer of silicon is brushed onto the model before the box is poured full.
 Now it is just waiting till the rubber is cured.
 After 24 hours or such we can start the exiting process of unboxing the rubber mould and retrieve the model.
 At this stage you can decide to produce an inner mould but with fast curing polyurethane I prefer a single mould.
 The model comes out unharmed and you can inspect the mould.
 You than can try to cast a new model. In this case I use a piece of PU foam as filling material, this not only saves resin but also prevents the model from becoming too heavy. After 30 minutes you can release it.
 A series of castings waiting to be finished. The roof edge on the model seems a bit too thin and turnes out to be fragile, corners are easily broken off. However in this case the roof can be easily clad with some 0.1 mm plastic when necessary.
Now wait for some of them to be finished as wagon. The quality isn't 100% due to enclosed airbubbles in the stanchions at the solebar but these can be repaired quite easily with a snip of plasticard.
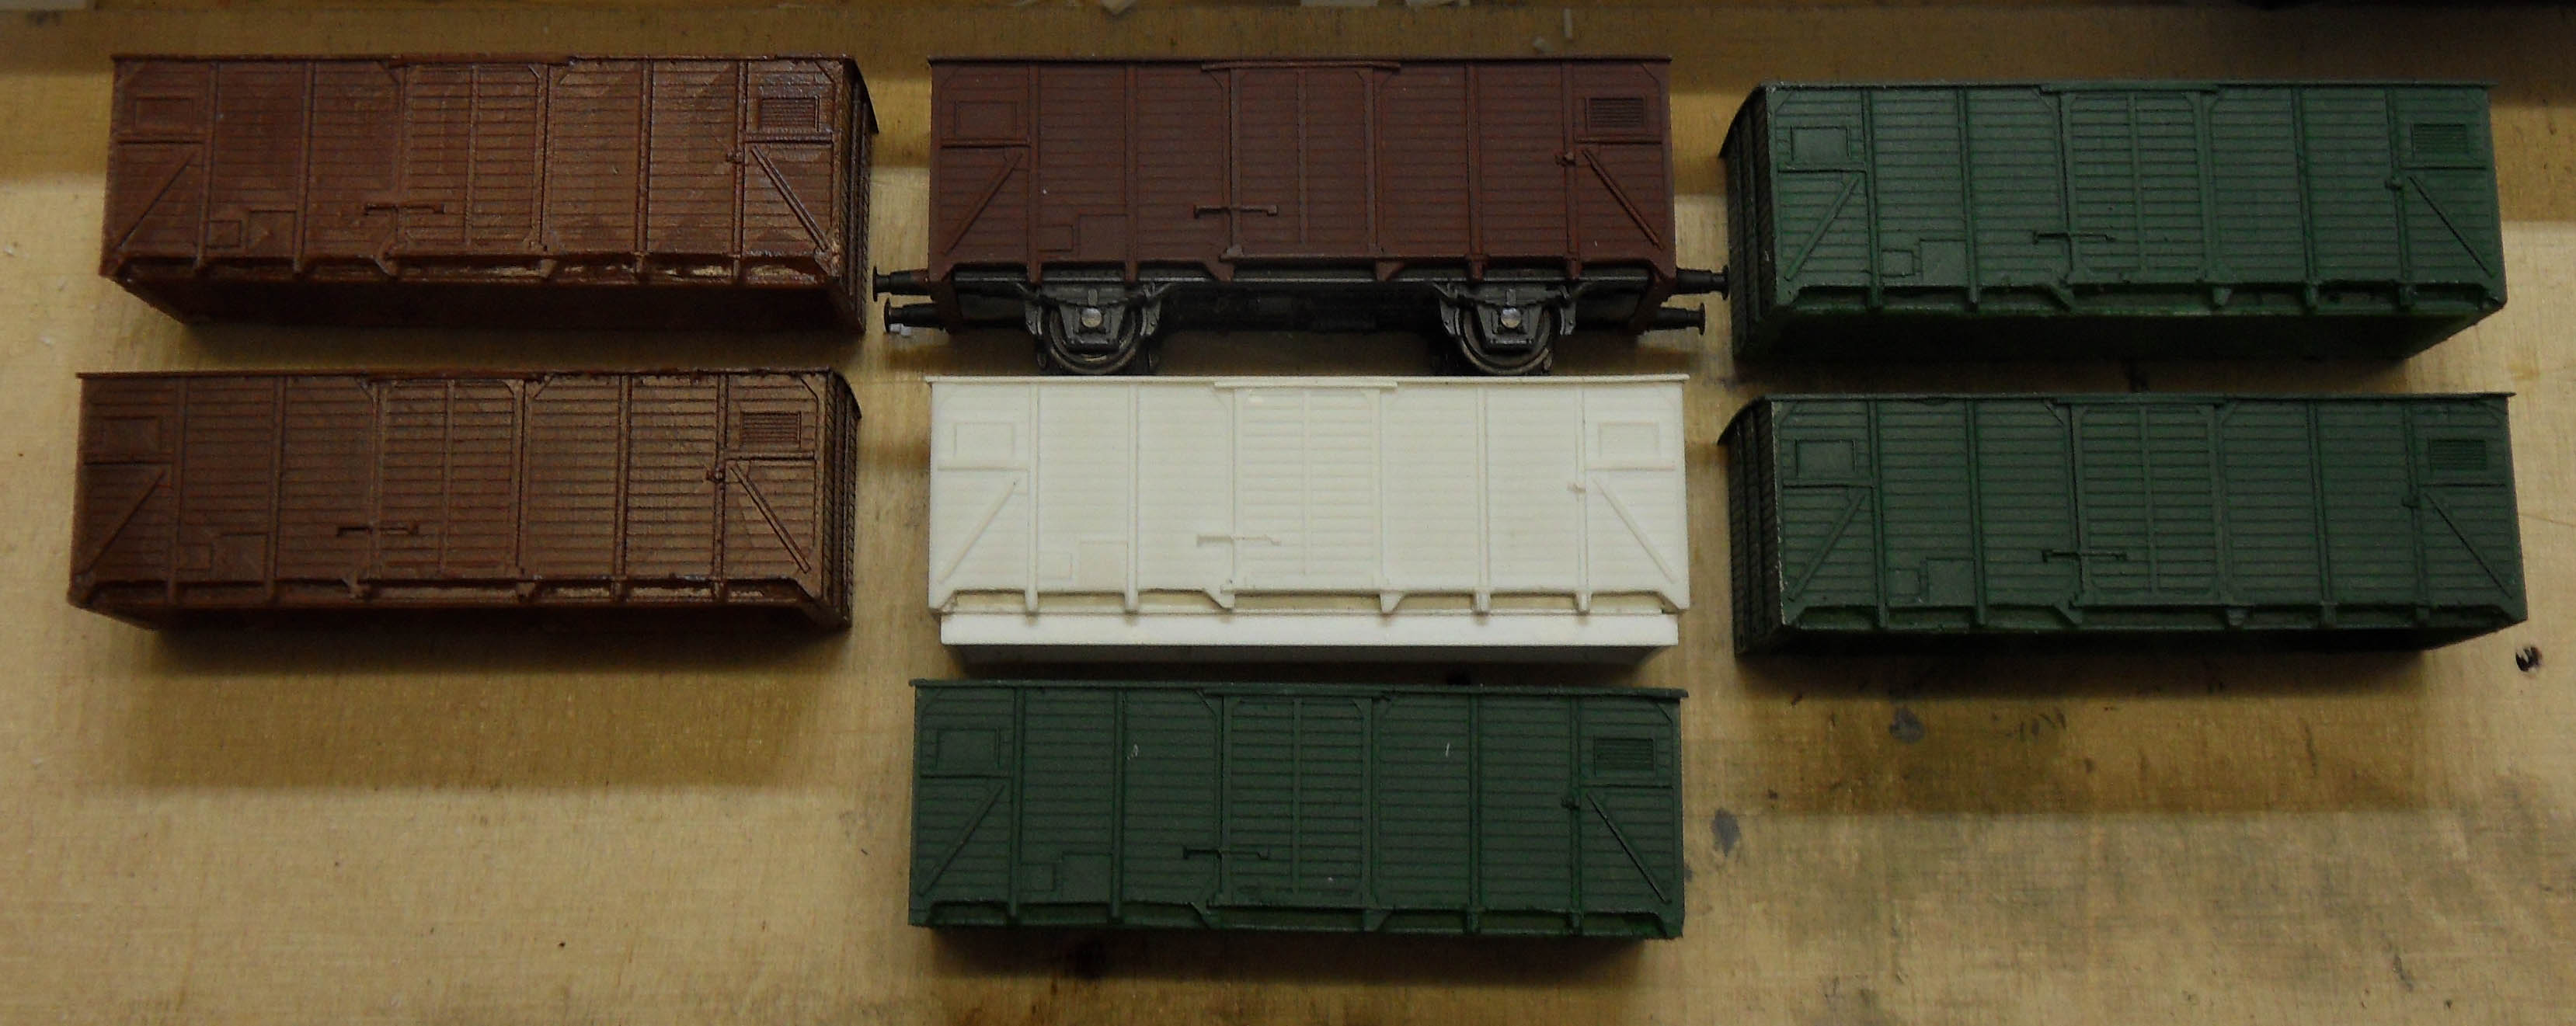
 Here we see 5 examples arranged around the master plus one directly finished milled example in the top center.
Conform expectations the main problem with casting is filling the end of the profiles in the mould with PU, this is not always succesful. This may lead to some entrapped airbubbles or sometimes one is missing entirely. This damage camn be repaired by cutting the part off and replace it with a piece (profiled) plastic. Airbubbles in the body can be filled with a piece of rod scraped to size from some available PS offcut. This problem with airbubbles probably could have been avoided by some advance thinking by extending the profiles below solebar level. If these bubbles stick below the wagon solebars then the part which collects the bubbles can be simply cut off. The above picture shows 5 castings arranged around the white PS master. On top in the center is another original finished with buffers and a temporary frame from an old Roco wagon. The green wagons will be finished as period 3a and the brown ones as period 3c.
 Drawings of the various frame parts extracted from the 3D drawing at the top.
The parts on the following picture were milled in 3D for springs and floor and 2.5D for the solebar. The floor was drawn thicker to give enough support for the W-irons not to bend under the forces made by the axle. Lack of detail compared to the original 3D design originates from the choice in milling cutter in the CNC program. That is a trade-off between the size of the cutter and the time required for milling and details. A big cutter in large steps is lots faster but shows far less detail than a tiny cutter in high resolution. In this case the 3D items were cut using 0.5 mm conical cutter followed by 0.5 mmm straight cutter for the contours and the 2.5D items only with a single 0.5 mm straight cutter. The parts come out quite nicely in respectively 15, 2*2 and 4*2 min from the milling machine. Gluing these parts together into a complete frame takes only a few moments and than we have a new frame to fit these casted wagons. This road saves at least a factor of 3 in time compared etching W-irons in 0.2 mm NS and soldering these together and fitting these to some floor sheet. Of course all of the remaining gubbins such as footsteps, buffers, hand rails and grips still need to be added to the models.
author: Henk Oversloot
date: 30 september 2012
date: 7 oktober 2012
date: 29 januari 2014
